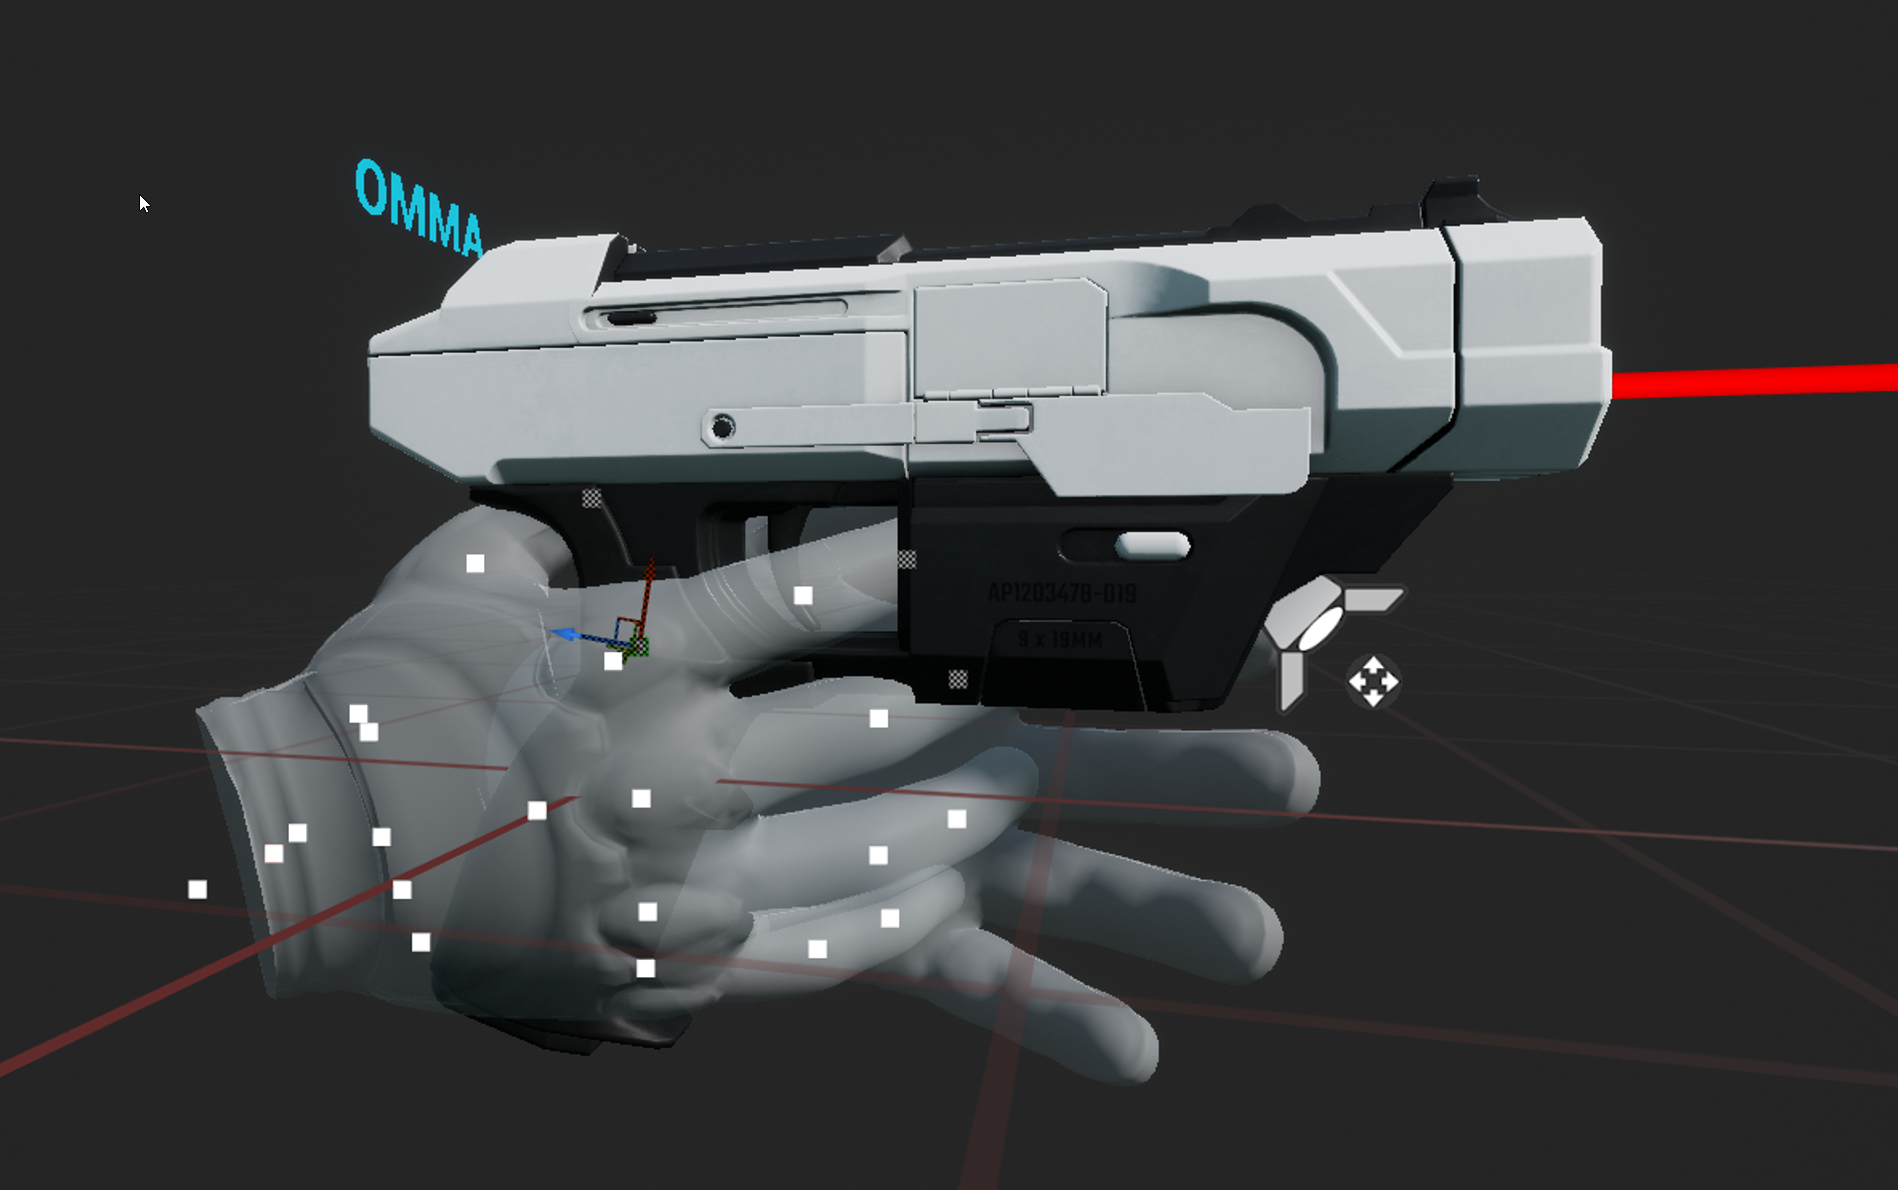
Ultimate GAS Showcase: Unleashing the Power of the Gameplay Ability System
I’m thrilled to share my latest project: a feature-rich Gameplay Ability System (GAS) designed for Virtual Reality but equally effective in 2D games. Join me as I explore the intricate details and powerful features of my GAS implementation in Unreal Engine. Buckle up!
Key Components
Before we dive in, let's list out the key components and features that make this system so powerful:
- Gameplay Abilities: The core of GAS, allowing for complex ability behaviors.
- Lazy-Load Gameplay Ability Components: Optimizing memory usage by loading components only when needed.
- Input Mappings: Seamlessly binding abilities to player inputs.
- Gameplay Attributes: Managing character stats and attributes.
- Dynamic Gameplay Tags: Tagging system for real-time behavior adjustments.
- Tag Relationship Mappings: Defining relationships between tags for nuanced interactions.
- Gameplay Stat Tag Stacks: Efficiently managing and replicating stat changes.
- ViewModel UI Integration: Syncing gameplay attributes with UI elements without any code!
The Basics: Weapon and Target
Let's start with the essentials: the weapon and the target. For this demonstration, I've created a simple pistol and an aim target.
Pistol Features
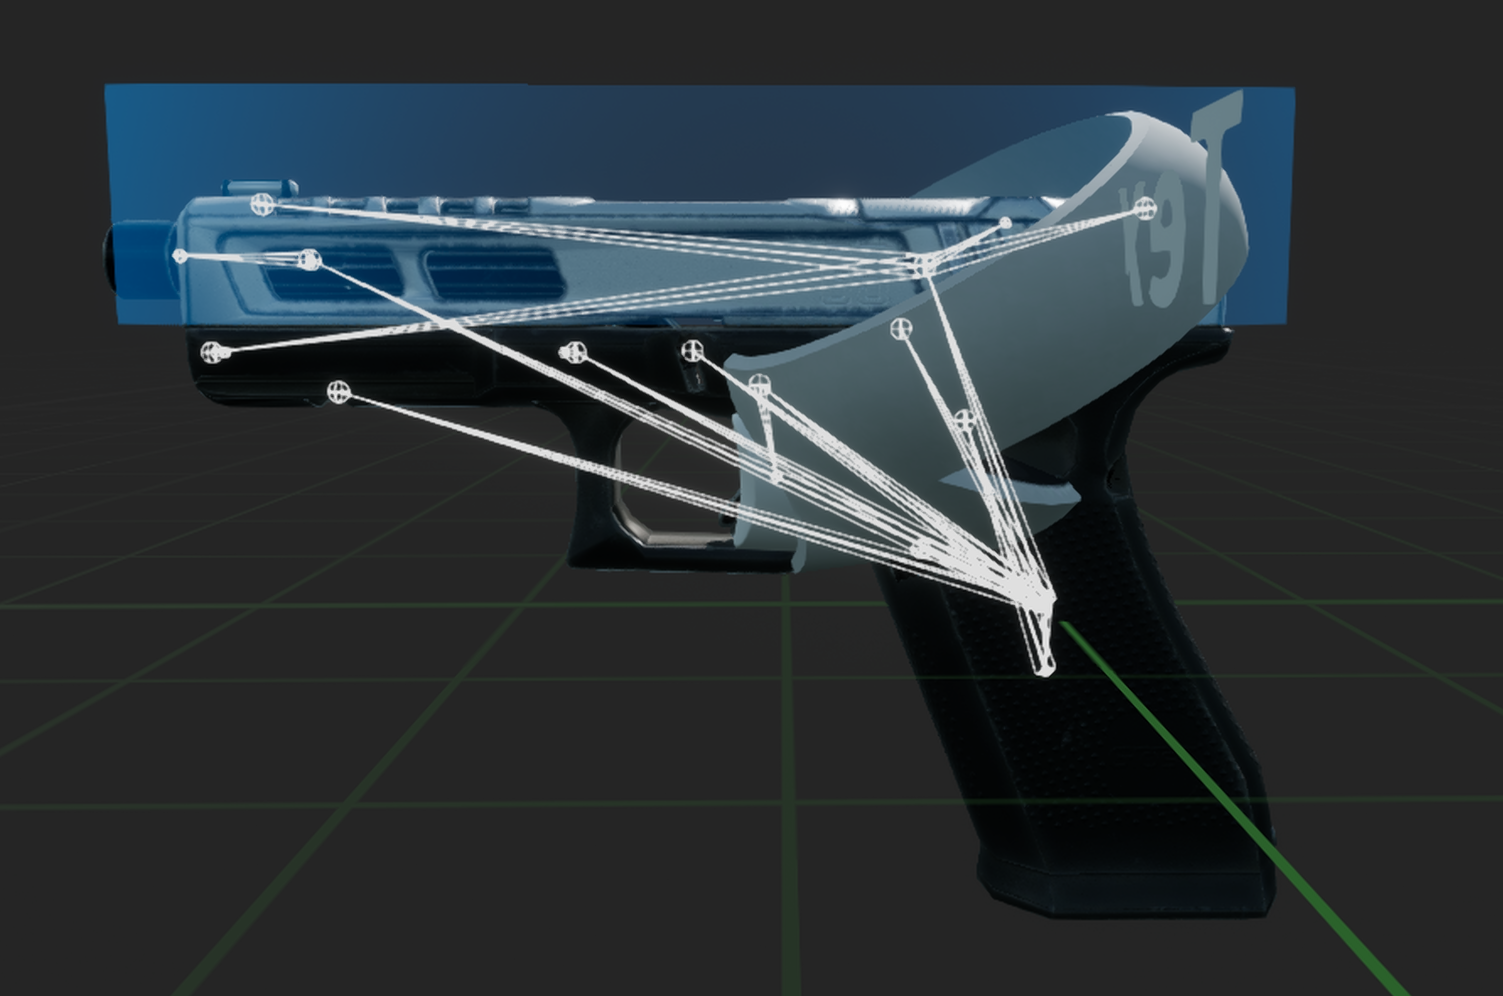
The pistol has four main inputs:
- Pull Trigger: Fires the weapon.
- Release Mag: Ejects the magazine.
- Toggle Flashlight: Turns the flashlight on or off.
- Grip and Rack Slide: Racks the slide back to chamber a round.
Each of these inputs is mapped to trigger a specific GAS Ability. The pistol's GAS component is loaded upon spawn to ensure it’s ready for action right away.
Target Features
The target is a stand-in for a human. It has a name and health attributes. Its GAS Component is "Lazy-Loaded," meaning it's only initialized and loaded into RAM after we interact with it.
Step 1: Ammunition
My weapons use a system called Stat Tag Stack. This is an array of gameplay tags mapped to a number that can be quickly and efficiently replicated. The first few indexes of this array are reserved for the chamber(s) of the weapon, and the rest are for the reserve ammo.
For testing, I’ve loaded 1 ICE bullet in the chamber and 16 more ICE bullets in the reserve ammo.

Step 2: Adding Gameplay Abilities
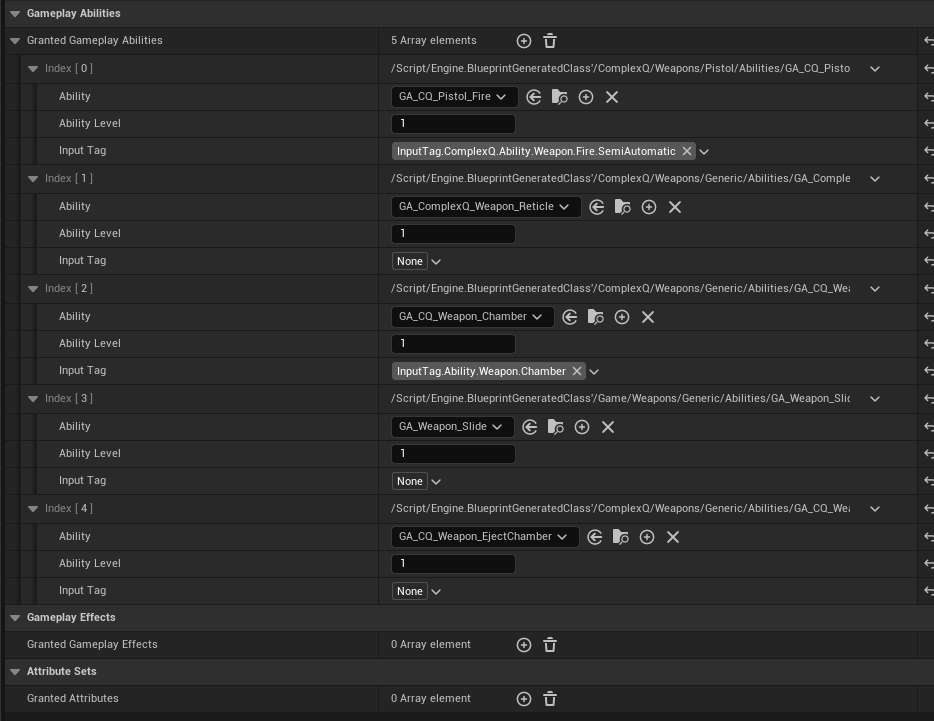
Abilities are added via an Ability Set, which is a Data Asset that maps abilities to their input tags. Here, I’m adding the fire ability, chamber, slide, eject chamber, and a passive ability for the reticle. Default Gameplay Effects and Attributes can also be added here, but they aren’t necessary for our pistol.
Step 3: Input Mappings
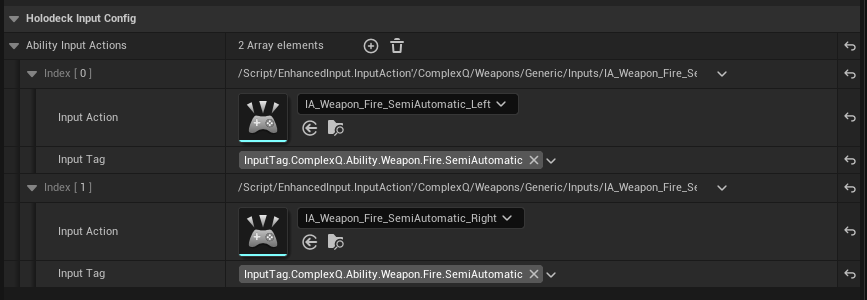
Triggering the abilities is made easy with variables for Default Input Mappings and an InputConfig Data Asset. This asset maps an InputAction to a Gameplay Tag, which then triggers the corresponding ability.

Step 4: Fire Ability Details
Fire Rate Control
We start with a timer that limits the weapon’s fire rate. Built-in GE_Cooldowns in GAS aren't suitable for high fire-rate abilities, as they might not handle frames correctly if the fire rate exceeds the game's framerate.
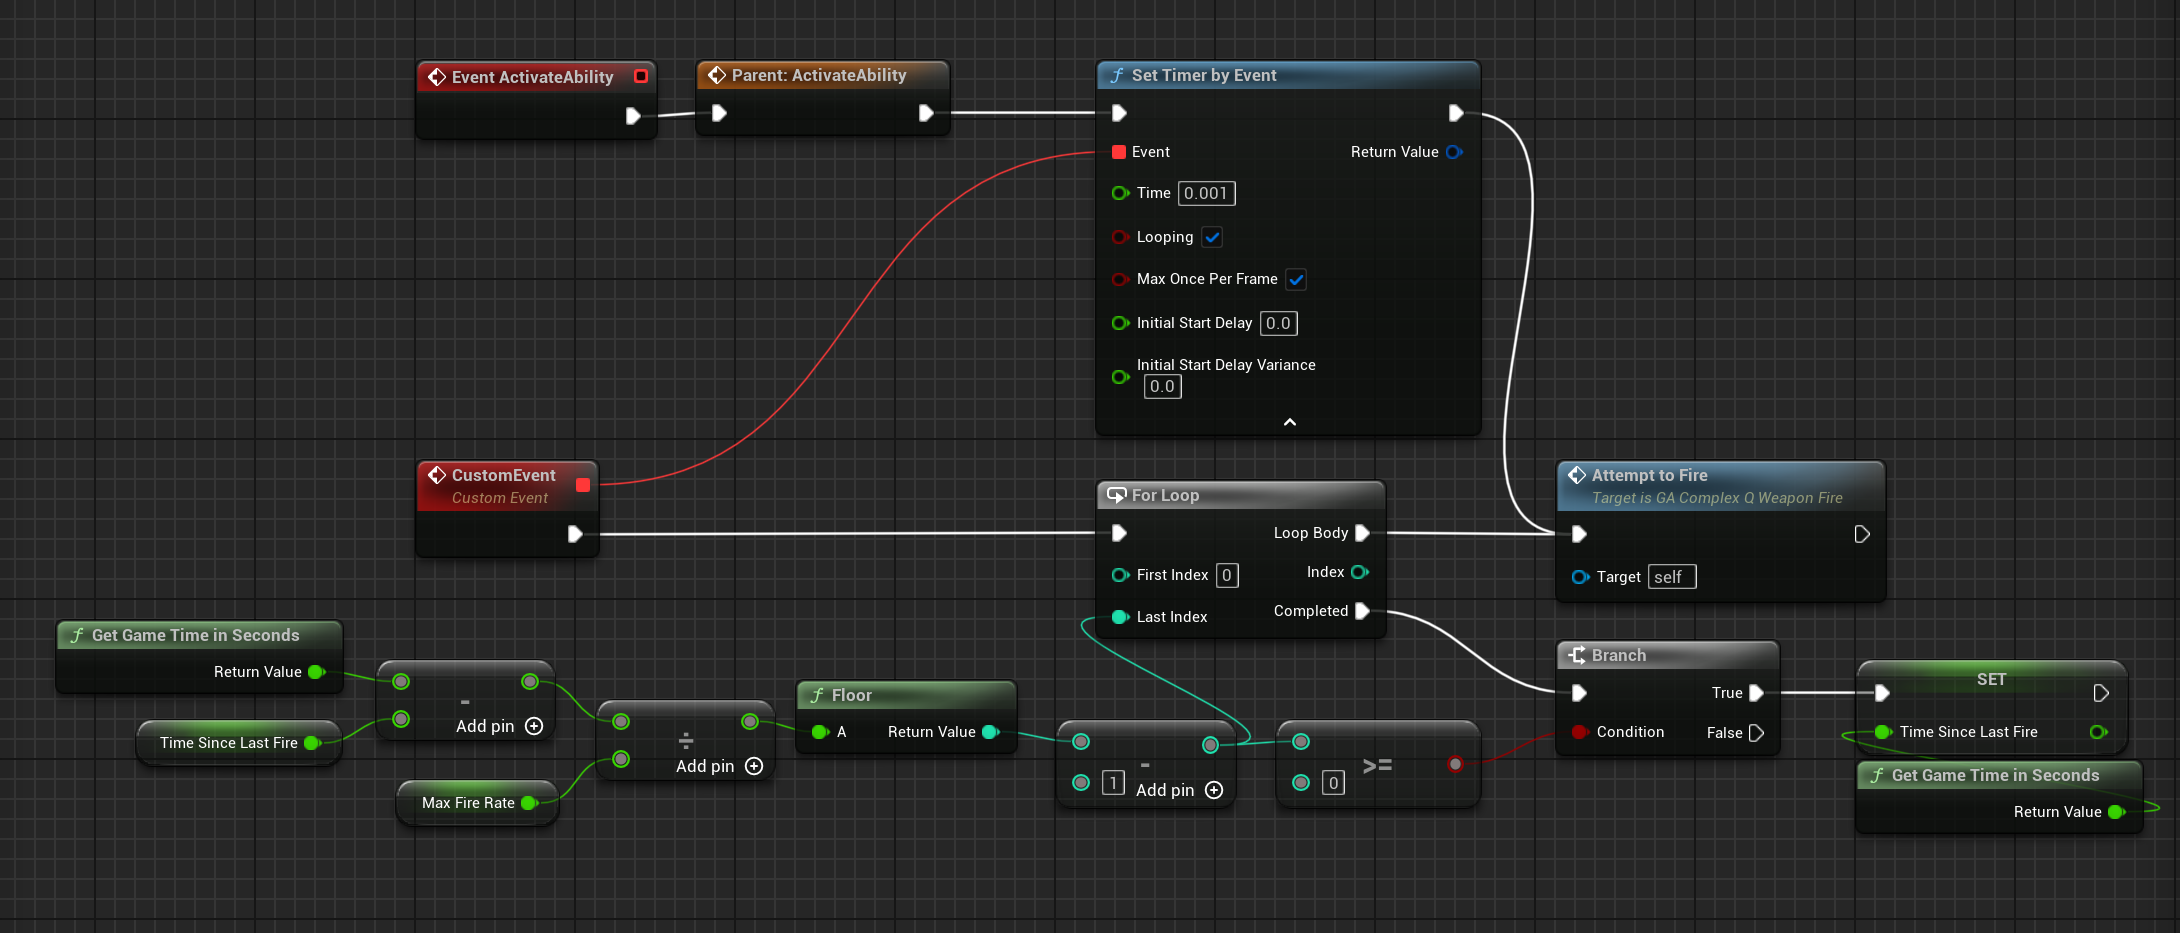
Affording and Committing Abilities
Once the timer triggers a fire event, we double-check if we can "afford" the ability and then commit it. If everything checks out, we begin "local targeting."

Affording and Committing
- Affording: Check the ability's cost against the weapon's current state (ammo check).
- Committing: Deduct the cost (remove a bullet from the chamber).
This is configured by a custom Ability Cost for Chamber Ammo.

/// HolodeckAbilityCost_ChamberAmmo.cpp
bool UHolodeckAbilityCost_ChamberAmmo::CheckCost(const UHolodeckGameplayAbility* Ability, const FGameplayAbilitySpecHandle Handle, const FGameplayAbilityActorInfo* ActorInfo, FGameplayTagContainer* OptionalRelevantTags) const
{
	if (auto const ReserveAmmoActor = Cast<IReserveAmmoInterface>(Ability->GetAvatarActorFromActorInfo()))
	{
		const int32 AbilityLevel = Ability->GetAbilityLevel(Handle, ActorInfo);

		const float NumStacksReal = Quantity.GetValueAtLevel(AbilityLevel);
		const int32 NumStacks = FMath::TruncToInt(NumStacksReal);
		checkf(ReserveAmmoActor->GetChamberCount() <= 1, TEXT("Multiple chambers not yet supported"))
		const bool bCanApplyCost = ReserveAmmoActor->HasChamberAmmoAt(0); // TODO - Support multiple barrels

		// Inform other abilities why this cost cannot be applied
		if (!bCanApplyCost && OptionalRelevantTags && FailureTag.IsValid())
		{
			OptionalRelevantTags->AddTag(FailureTag);
		}
		return bCanApplyCost;
	}

	return false;
}

void UHolodeckAbilityCost_ChamberAmmo::ApplyCost(const UHolodeckGameplayAbility* Ability, const FGameplayAbilitySpecHandle Handle, const FGameplayAbilityActorInfo* ActorInfo, const FGameplayAbilityActivationInfo ActivationInfo)
{
	if (ActorInfo->IsNetAuthority())
	{
		if (auto const ReserveAmmoActor = Cast<IReserveAmmoInterface>(Ability->GetAvatarActorFromActorInfo()))
		{
			const int32 AbilityLevel = Ability->GetAbilityLevel(Handle, ActorInfo);

			const float NumStacksReal = Quantity.GetValueAtLevel(AbilityLevel);
			const int32 NumStacks = FMath::TruncToInt(NumStacksReal);

			ReserveAmmoActor->RemoveChamberAmmoAt(0);
		}
	}
}
Other costs include checking Reserve Ammo or specific Stat Tag Stack counts.
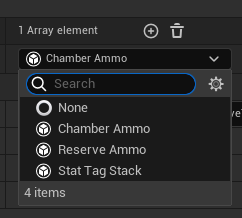
Gameplay Cues
When the weapon is fired, a "Fire" Gameplay Cue Notify is triggered. This local event has a Gameplay Tag representing the weapon type and muzzle information. GAS automatically activates the appropriate Gameplay Effect, which is used to spawn the muzzle flash, sound, particle effects, camera shake, and other client-side effects. Note that Gameplay Cues are not replicated, so you need to replicate the event that triggers them, which is straightforward with Gameplay Abilities.
Local Targeting
"Local Targeting" is my favorite part of this ability. Here’s where we find the "Target" of our ability and send it to the server. For ray-cast weapons, we would perform a ray trace and inform the server of the hit actor. In this case, we're spawning physical projectiles, waiting for their hit event, and notifying the server of what they hit. The server then checks if it’s a valid target and applies Gameplay Effects and Physics Impulses to the target.
Committed Ability
Once the ability is successfully activated and committed, we proceed with post-ability logic. For example, I trigger another ability to rack the slide of the weapon, which plays an animation and sets a Stat Tag Stack. If the slide is held, I skip racking the slide. Currently, I access the slide component directly, but this will be updated to check a Dynamic Tag added when the slide is held.
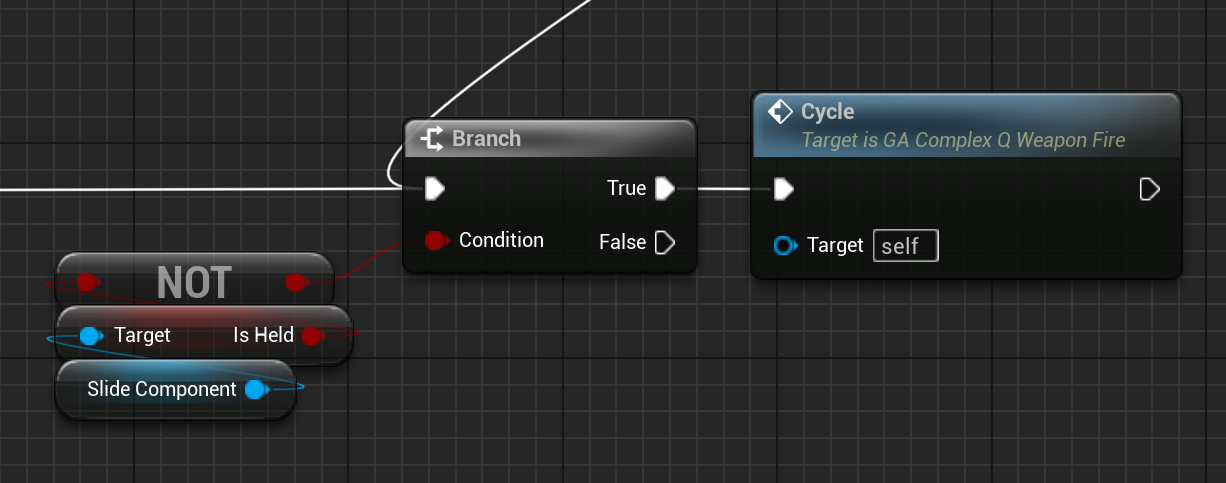
Projectile Impact
When the projectile hits the target, the server attempts to find the GAS component on the hit actor and apply a Gameplay Effect. This effect can be as simple as damaging the actor or applying a random "elemental" effect. I also use an "Execution Calculation" to handle complex logic, such as checking for a "Weakness" tag on the hit physical material to apply extra damage.
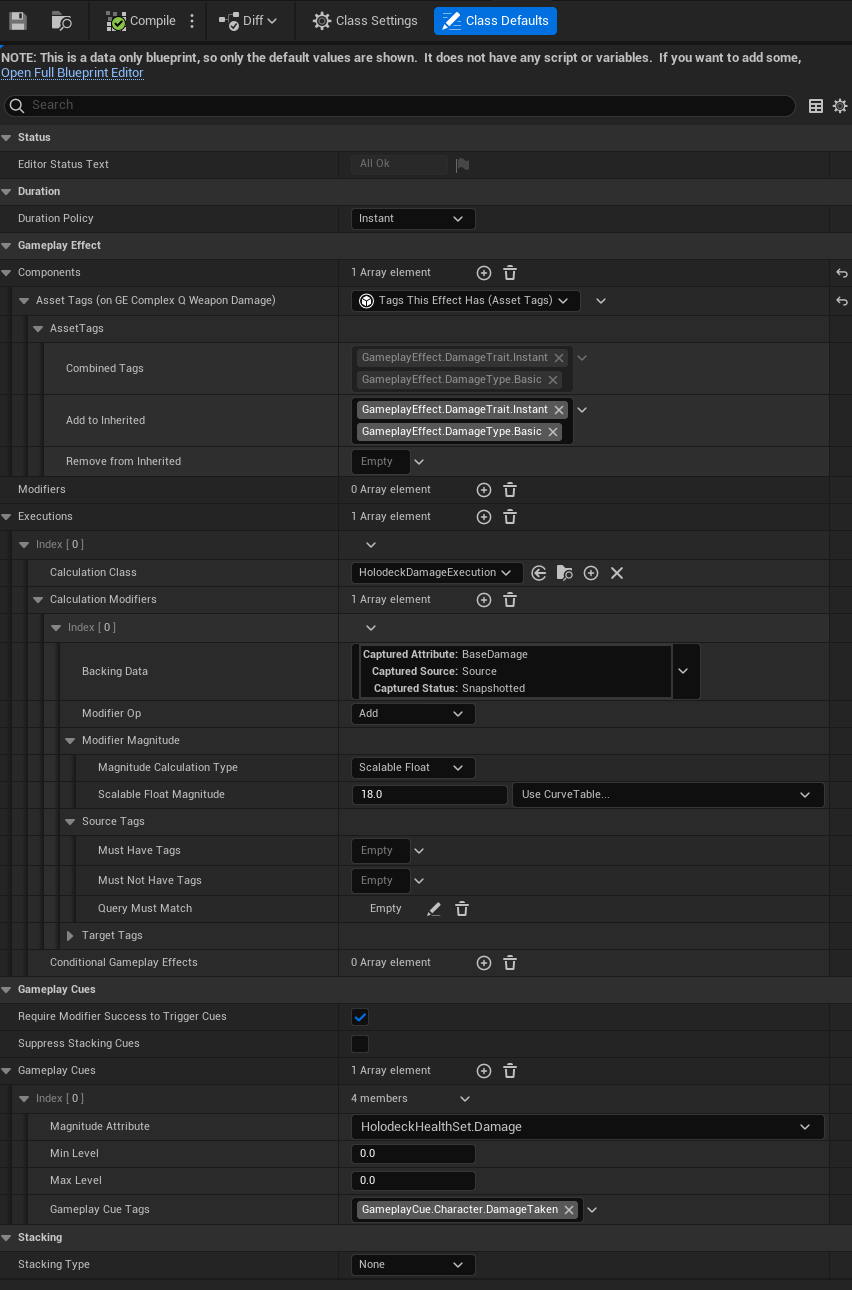
Gameplay Cue Notifies
Quick cool thing, gameplay effects can automatically trigger Cue Notifies when an attribute is modified by a specific magnitude. This can automatically trigger the "hit" Cue Notify, spawning blood, sound, and more.
UI Integration
Now that we have a pistol that can fire and damage a target, we need to display this information to the player. I've created a ViewModel system that can be used to display any information about the player or the target. This system integrates with Gameplay Attributes. ViewModels run off of what's called "FieldNotify" events. These events are automatically triggered when a Gameplay Attribute is modified, updated, replicate, anytime the value changes.
Here's a peak at how the AttributeSet is integrated with FieldNoficiations:
UCLASS(Abstract)
class HOLODECKGAME_API UHolodeckAttributeSet : public UAttributeSet, public INotifyFieldValueChanged
{
	GENERATED_BODY()

public:
	virtual UWorld* GetWorld() const override;

public:
	UHolodeckAbilitySystemComponent* GetOwningHolodeckAbilitySystemComponent() const;

	struct HOLODECKGAME_API FFieldNotificationClassDescriptor : public ::UE::FieldNotification::IClassDescriptor
	{
		virtual void ForEachField(const UClass* Class, TFunctionRef<bool(UE::FieldNotification::FFieldId FielId)> Callback) const override;
	};

	virtual FDelegateHandle AddFieldValueChangedDelegate(UE::FieldNotification::FFieldId InFieldId, FFieldValueChangedDelegate InNewDelegate) override;
	virtual bool RemoveFieldValueChangedDelegate(UE::FieldNotification::FFieldId InFieldId, FDelegateHandle InHandle) override;
	virtual int32 RemoveAllFieldValueChangedDelegates(const void* InUserObject) override;
	virtual int32 RemoveAllFieldValueChangedDelegates(UE::FieldNotification::FFieldId InFieldId, const void* InUserObject) override;
	virtual const UE::FieldNotification::IClassDescriptor& GetFieldNotificationDescriptor() const override;
	virtual void BroadcastFieldValueChanged(UE::FieldNotification::FFieldId InFieldId) override;

private:
	UE::FieldNotification::FFieldMulticastDelegate Delegates;
	TBitArray<> EnabledFieldNotifications;
};
This allows for super simple FieldNotify events to be triggered. For example, here's how we trigger that the MaxHealth, GetHealthPercent function and the GetMaxHealth functions have been updated when MaxHealth is replicated
void UHolodeckHealthSet::OnRep_MaxHealth(const FGameplayAttributeData& OldValue)
{
	// Replication logic...
  // ...

	UE_MVVM_BROADCAST_FIELD_VALUE_CHANGED(MaxHealth);
	UE_MVVM_BROADCAST_FIELD_VALUE_CHANGED(GetMaxHealth);
	UE_MVVM_BROADCAST_FIELD_VALUE_CHANGED(GetHealthPercent);
}
Another helper Macro was created for the "PostAttributeChange" function. The first variable waits for that attribute to change, and then it notifies the FieldNotify on the right that it has updated.
void UHolodeckHealthSet::PostAttributeChange(const FGameplayAttribute& Attribute, float OldValue, float NewValue)
{
	Super::PostAttributeChange(Attribute, OldValue, NewValue);
  // ...logic here...
  // ....

	// Field notify the right variable when the left attribute changes
	POST_ATTRIBUTE_CHANGE_FIELD_NOTIFY(Health, Health);
	POST_ATTRIBUTE_CHANGE_FIELD_NOTIFY(Health, GetHealthPercent);
	POST_ATTRIBUTE_CHANGE_FIELD_NOTIFY(Health, GetHealth);

	POST_ATTRIBUTE_CHANGE_FIELD_NOTIFY(MaxHealth, MaxHealth);
	POST_ATTRIBUTE_CHANGE_FIELD_NOTIFY(MaxHealth, GetHealthPercent);
	POST_ATTRIBUTE_CHANGE_FIELD_NOTIFY(MaxHealth, GetMaxHealth);

	POST_ATTRIBUTE_CHANGE_FIELD_NOTIFY(Healing, GetHealing);
	POST_ATTRIBUTE_CHANGE_FIELD_NOTIFY(Damage, GetDamage);
}
With our AttributeSet now supporting FieldNotify events, we can now create a ViewModel that listens to these events and updates the UI accordingly.
Open your Widget and add the Attribute Set to the ViewModels. It will automatically show up since we implemented the INotifyFieldValueChanged interface.
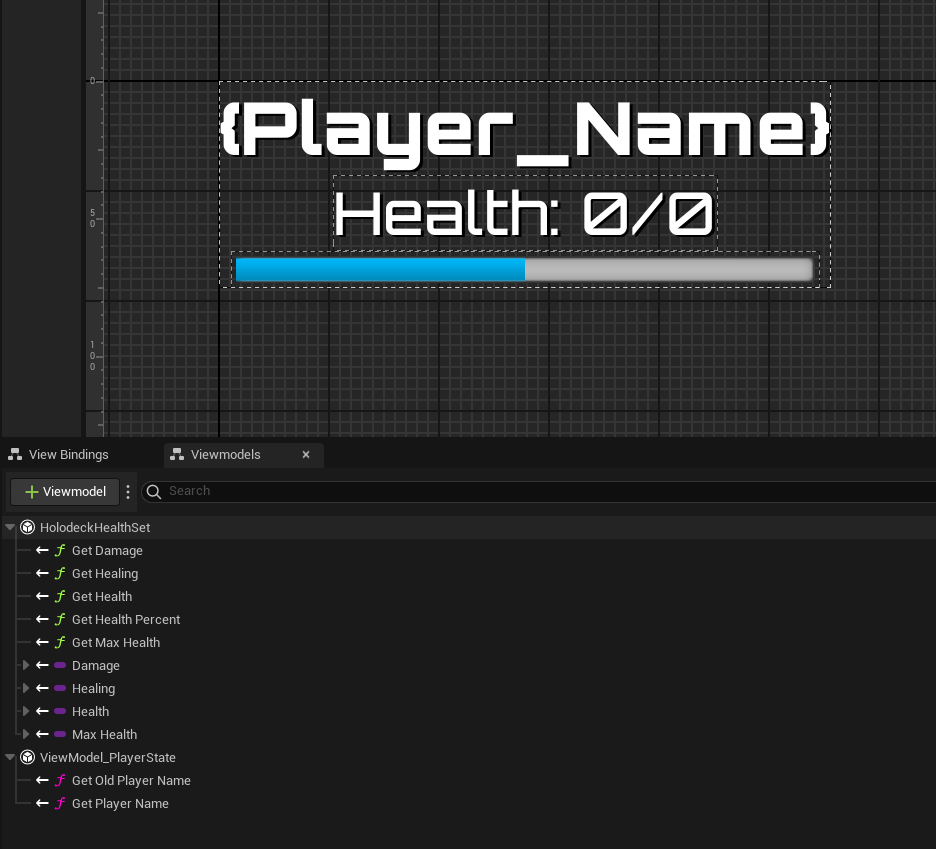
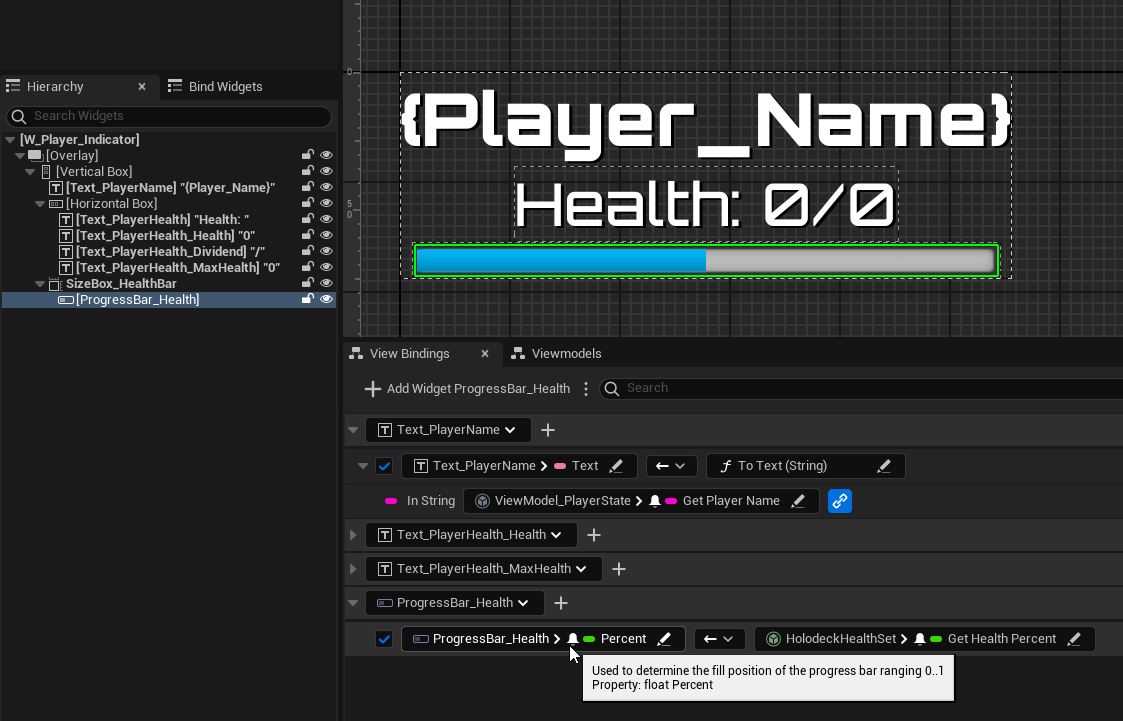
Now that the ViewModel is setup, we can bind its values to our widget! Here I've bound the Health, MaxHealth, and HealthPercent to the UI. I've also bound the name to a PlayerStateViewModel I made earlier.
We're not done yet!
ViewModels don't work like magic. They have to be instantiated and owned by an actor or component. In our case, since it's just the ability set, we can access this AbilitySet from the onwing GAS Component.
We need to tell the Widget how to get this AbilitySet.
The cleanest way I've found is to use what's called a "ViewModelResolver".
It has two functions you override, CreateInstance and DestroyInstance.
CreateInstance has two inputs and an output. The two inputs are ExpectedType, which is the class of the ViewModel we expect, and UserWidget which is the instance of the widget that's requesting the ViewModel.
The output is the ViewModel instance itself.
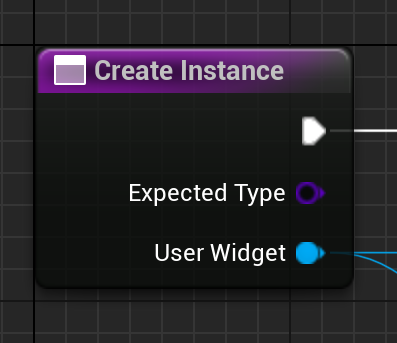
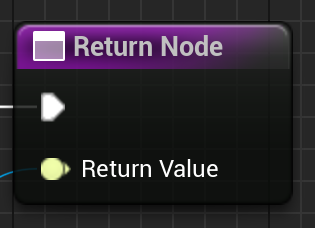
We then just select the ViewModel resolver, and the Widget will be able to get the AbilitySetViewModel, no matter what class you choose.
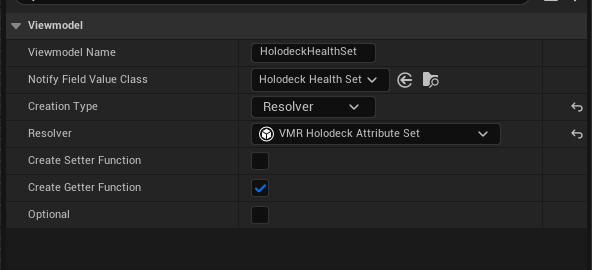
Great! We now have a weapon that fires, damages a target, and displays the damage to the player!
Here's a list of unique things I added to this system, which I wasn't able to include in the article:
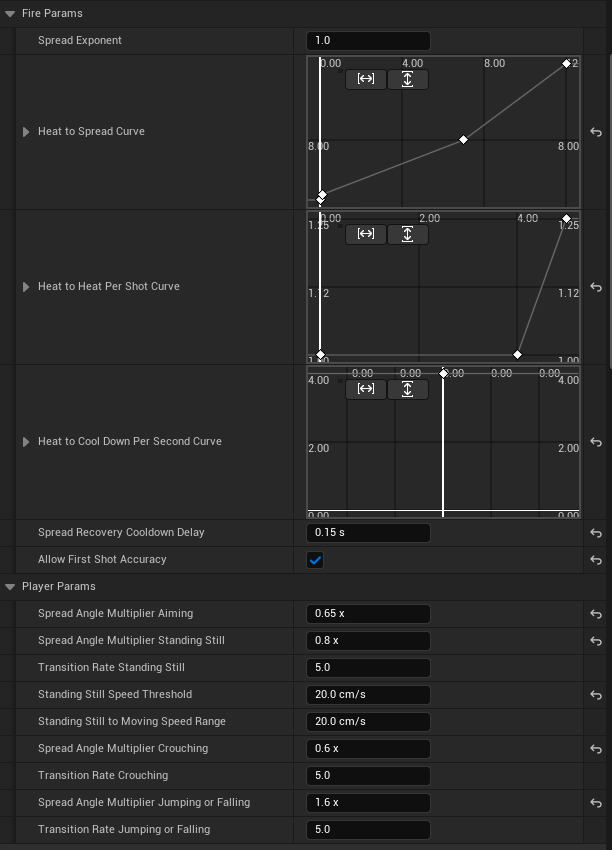
Configurable Fire and Player params that drive the firing and the design of the World Space Reticle
WeaponCartridgeDefinition for each element type. These hold WeaponBulletDefinitions. A rifle cartridge holds one bullet, while a shotgun cartridge holds multiple in the array.

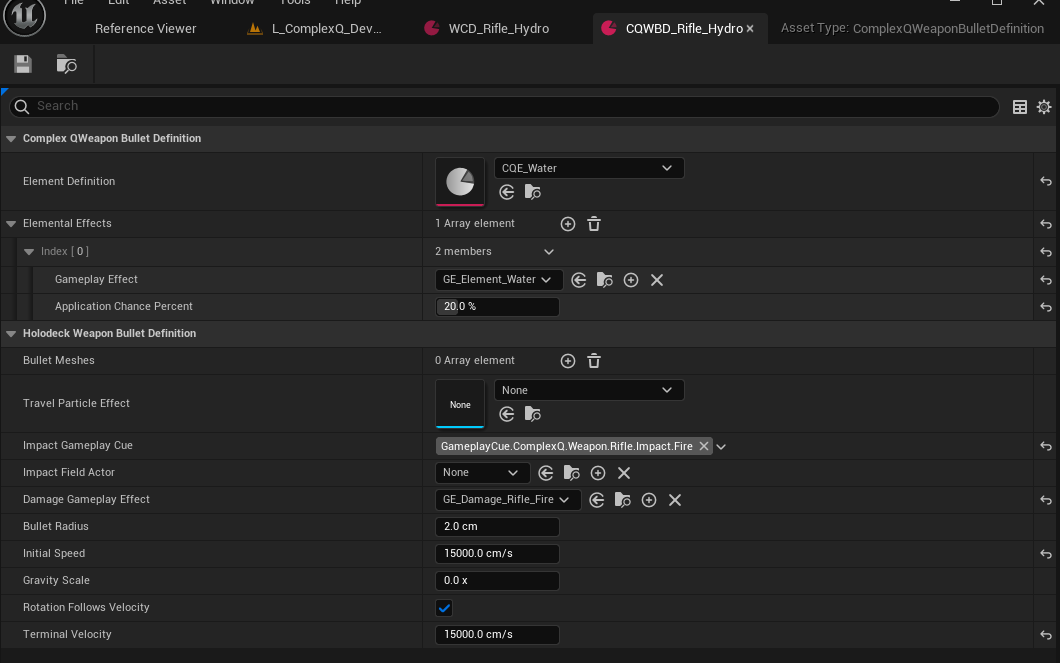
WeaponBulletDefinition: holds the damage effect, elemental effect and percentage, bullet size, speed, gravity, and more stats.
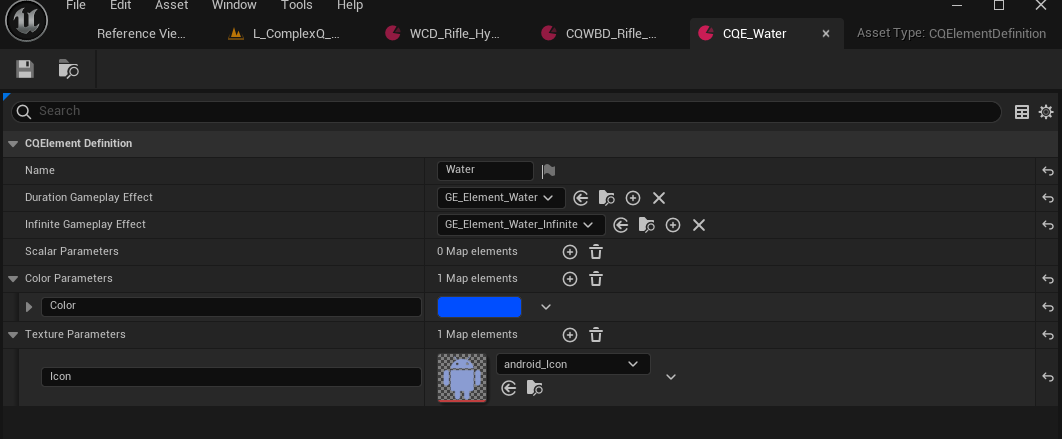
ElementDefinition: Holds the elemental effects, name, and details about its color, textures, and more.
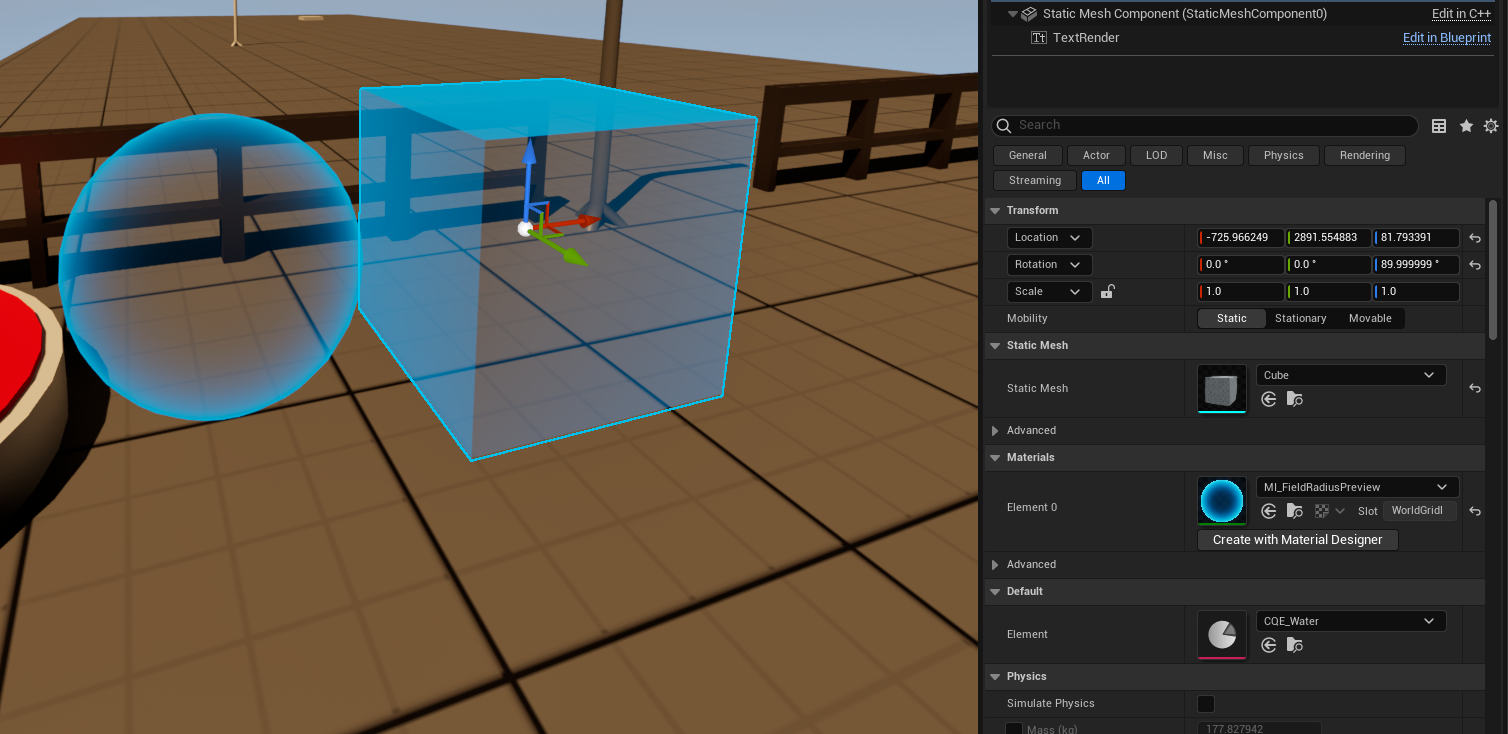
Volumes designed to apply Elemental Effects to the player when they enter them. These are designed to be hidden in the level and props, such as lava flowing from a volcano, or water in a fountain.
These are being phased out for physical material hit events, but they're still cool!
Working towards finger positioning on the VR Grips. This is extremely WIP.
